Introduction
Grooming is a vital aspect of cat care that promotes health, comfort, and a strong bond between you and your feline friend. Regular grooming practices, such as brushing, nail trimming, ear cleaning, and occasional bathing, help keep your cat’s coat smooth, reduce shedding, prevent painful matting, and promote healthy skin. Beyond physical benefits, grooming sessions offer a chance to bond with your cat, fostering trust through gentle care and attention. By incorporating consistent grooming into your routine, you ensure your cat not only looks their best but also feels great, while also allowing you to monitor their health for any signs of issues like skin irritations or parasites.
Why Cat Grooming Matters
Cat grooming is more than just keeping your feline friend looking good—it’s a vital part of their health and happiness. Regular grooming strengthens the bond between you and your cat while preventing issues that can affect their well-being. Here’s why it matters:
Promotes Skin and Coat Health
It can be done by brushing your feline coat to remove any dirt. It also spreads natural oils, reducing dryness and irritation. For long-haired breeds, grooming prevents painful mats that can harbor bacteria or parasites.
Reduces Hairballs
Cats groom themselves, which can lead to loose fur swallowing, causing hairballs. Regular brushing minimizes the amount of hair ingested, sparing your cat discomfort and reducing the risk of intestinal blockages.
Prevents Parasites and Infections
Grooming sessions allow you to check for fleas, ticks, or skin abnormalities. Early detection of lumps, sores, or redness can lead to prompt veterinary care, preventing minor issues from becoming serious.
Supports Nail and Paw Health
Nail trimming is very important for a cat’s normal gait. Checking paws during grooming ensures no debris or injuries are overlooked, keeping your cat comfortable and mobile.
Enhances Emotional Well-Being
Grooming is a bonding experience that builds trust. Gentle handling during brushing or bathing can calm anxious cats, while regular attention helps shy cats feel secure. A well-groomed cat is also more likely to feel confident and content.
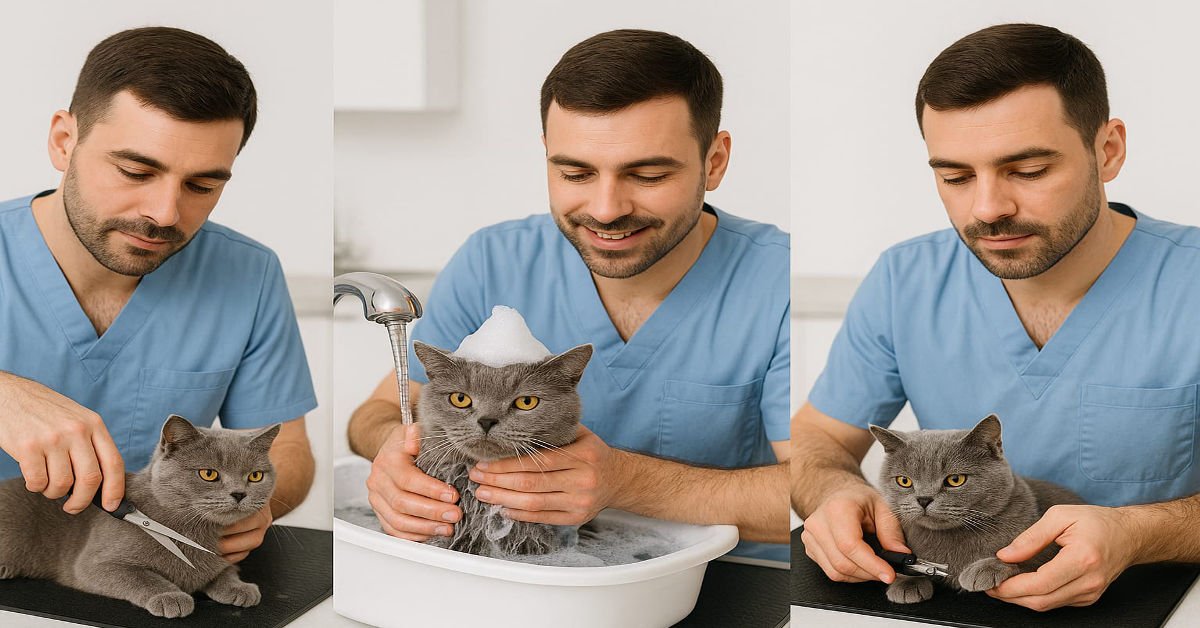
Step-by-step guide
1:
Brushing Basics: Keeping Your Cat’s Coat Shiny & Tangle-Free
A well-groomed cat is a happy cat, and regular brushing is key to maintaining a lustrous, knot-free coat. Beyond enhancing your cat’s appearance, brushing supports their health by preventing skin issues, reducing hairballs, and fostering a stronger bond between you and your feline companion. Whether your cat sports a short, sleek coat or a flowing, long one, these brushing essentials will keep them looking and feeling great.
The Importance of Regular Brushing
It spreads natural oils, giving their coat a healthy glow while clearing away loose hair, dust, and dander. For long-haired cats, it prevents painful mats that can lead to skin irritation. Brushing also cuts down on hairballs by removing fur before your cat swallows it during grooming. Plus, it’s an opportunity to spot fleas, ticks, or skin changes early, helping you address health concerns promptly.
Selecting the Right Grooming Tools
Choosing the correct tools is critical for effective brushing, tailored to your cat’s coat:
-
Short-haired cats: Use a soft-bristle brush or rubber mitt to lift loose fur and massage the skin. A fine comb is great for detailed areas like the face.
-
Long-haired cats: Opt for a wide-toothed comb or a slicker brush with gentle, curved bristles to tackle tangles. A de-matting tool can help with tough knots.
-
Dense-coated breeds: For cats like Siberians or Ragdolls, an undercoat rake removes loose undercoat fur without harming the outer layer.
Brushing Frequency
How often you brush depends on your cat’s coat and habits:
-
Short-haired cats: Once or twice weekly, keep their coat tidy and control shedding.
-
Long-haired cats: Daily brushing prevents tangles, especially in areas like the belly or behind the ears.
-
Shedding peaks: In spring and fall, increase brushing for all cats to manage excess fur.
Outdoor cats may need extra sessions to remove debris, while indoor cats may require less.
How to Brush Your Cat
Follow these steps for a smooth brushing routine:
-
Set a Relaxed Mood: Pick a quiet spot where your cat feels at ease. Use treats or soft words to make it enjoyable.
-
Ease Them In: For cats new to brushing, let them inspect the tool first. Start with brief sessions, building up over time.
-
Brush with the Grain: Move the brush gently from head to tail, aligning with the fur’s natural flow. Avoid tugging on sensitive spots.
-
Target Tangle Zones: Focus on mat-prone areas like the underbelly or leg joints. Use a comb for precision.
-
Address Mats Carefully: For long-haired cats, gently tease out small mats with a comb. Large mats may need a groomer’s expertise.
-
Inspect the Skin: Check for irritation, lumps, or pests as you brush, especially in thick coats.
-
Reward Your Cat: End with treats or affection to reinforce positive feelings.
Making Brushing Enjoyable
Try these tips:
-
Choose the Right Moment: Brush when your cat is calm, like after eating or resting.
-
Stay Gentle: Use light strokes and stop if your cat seems agitated (e.g., tail twitching or growling).
-
Keep It Brief: Start with short sessions for reluctant cats, gradually lengthening as they adjust.
-
Distract Them: Offer a toy or treat to keep them engaged.
-
Be Regular: Consistent brushing prevents severe tangles, making sessions easier.
Overcoming Common Issues
Address these challenges with care:
-
Tangles: Gently work through small mats with fingers or a comb. Severe cases may require professional help.
-
Excessive Shedding: A balanced diet with omega-3s can reduce shedding. Consult a vet if it persists.
When to Call a Professional
Some situations need expert intervention:
-
Tight Mats: Dense mats near the skin may require shaving by a groomer.
-
Skin Problems: Ongoing redness or sores could signal allergies or infections, needing veterinary attention.
-
Aggression: If brushing causes extreme stress, a professional can offer safe grooming solutions.
Why a Groomed Coat Matters
A tangle-free, shiny coat reflects a healthy, contented cat. Routine brushing not only enhances their comfort but also deepens your connection. By following these brushing basics, you’ll ensure your cat stays radiant and relaxed.
2:
Bathing Your Cat: Tips for a Stress-Free Experience
Bathing a cat can feel like a daunting task, especially since many felines are not fond of water. Whether your cat needs a bath due to dirt, fleas, or a medical condition, these detailed tips will guide you through the process to ensure it’s safe, effective, and minimally traumatic.
Why Bathe Your Cat?
Cats are naturally fastidious groomers, often keeping themselves clean without human intervention. However, there are situations where a bath becomes necessary:
-
Dirt or Substances: If your cat gets into something sticky, greasy, or toxic (like paint or oil), a bath is essential to remove the substance safely.
-
Flea Infestations: Medicated or flea-specific shampoos can help control parasites.
-
Medical Conditions: Cats with skin conditions, allergies, or mobility issues may require regular baths as part of their care.
-
Long-Haired Breeds: Breeds like Persians or Maine Coons may need occasional baths to prevent matting or excessive shedding.
-
Odor Control: Cats with limited grooming ability (e.g., overweight or elderly cats) may develop odors that require bathing.
Before proceeding, consult your veterinarian to confirm that bathing is necessary and safe for your cat, especially if they have health concerns or require specific shampoos.
Preparing for the Bath
Preparation is key to a smooth bathing experience. Taking time to set up properly can reduce stress and prevent mishaps.
1. Gather Supplies
Have everything ready before bringing your cat into the bathing area to avoid scrambling mid-process. Essential supplies include:
-
Cat-Safe Shampoo: Use a shampoo specifically formulated for cats, as human or dog shampoos can irritate their skin or be toxic. If treating fleas or a medical condition, use a vet-recommended product.
-
Towels: Have several soft, absorbent towels for drying your cat. A small hand towel can be used to gently clean their face.
-
Non-Slip Mat: Place a rubber mat or towel in the sink or tub to give your cat secure footing.
-
Brush: A grooming brush to remove loose fur and mats before the bath.
-
Cup or Spray Nozzle: For gently rinsing your cat. A handheld spray nozzle with low pressure works well, but a plastic cup or pitcher is a good alternative.
-
Cotton Balls: To place in your cat’s ears to prevent water from entering.
-
Treats: To reward your cat and create positive associations with bathing.
-
Optional: A washcloth for cleaning sensitive areas like the face.
2. Choose the Right Location
A sink is often better than a bathtub for bathing a cat because it’s at a comfortable height for you and less intimidating for your cat. If using a bathtub, ensure it’s clean and free of slippery surfaces. A small, enclosed space reduces the chance of your cat escaping.
3. Trim Nails
To minimize scratches, trim your cat’s nails a day or two before the bath.
4. Brush Your Cat
This is especially important for long-haired cats, as wet mats are harder to untangle and can cause discomfort.
5. Create a Calm Environment
Cats are sensitive to their surroundings, so keep the bathing area quiet and free from sudden noises or distractions. Close doors to prevent escapes, and consider playing soft music to soothe your cat. If possible, have a second person to assist, especially for holding or comforting your cat.
Step-by-Step Bathing Process
Follow these steps to bathe your cat efficiently while keeping stress to a minimum.
Step 1: Acclimate Your Cat
Introduce your cat to the bathing area gradually. Let them explore the sink or tub without water, and offer treats or praise to create positive associations. If your cat seems anxious, give them a few days to get comfortable with the space before attempting a bath.
Step 2: Protect Their Ears
Be careful not to push them too far in, and remove them immediately after the bath.
Step 3: Wet Your Cat
Using a cup or low-pressure spray nozzle, wet your cat’s body starting from the neck down, avoiding the face and ears. Speak in a calm, reassuring tone to keep them relaxed.
Step 4: Apply Shampoo
Dilute the cat shampoo with water if the instructions recommend it, as this makes it easier to rinse. Apply a small amount to your hands or directly to your cat’s fur, and gently massage it into their coat, focusing on dirty or affected areas. Be thorough but gentle, and avoid getting shampoo near their eyes, nose, or mouth.
Step 5: Rinse Thoroughly
Use a cup or spray nozzle to direct water gently over their body.
Step 6: Clean the Face
If necessary, use a small amount of shampoo on the washcloth for specific areas, but rinse carefully with a clean, damp cloth.
Step 7: Dry Your Cat
Avoid vigorous rubbing, as this can cause discomfort or tangles. If your cat tolerates it, you can use a hairdryer on the lowest heat and speed setting, keeping it at least 12 inches away to avoid burns or stress. Most cats prefer air-drying in a warm, draft-free room.
Post-Bath Care
-
Reward Them: Offer treats, praise, or playtime to reinforce positive associations with bathing.
-
Keep Them Warm: Place your cat in a warm, cozy area to dry completely. Avoid drafts or cold rooms.
-
Monitor Their Skin: Check for signs of irritation or dryness over the next few days. If you notice redness, itching, or unusual behavior, consult your veterinarian.
-
Clean Up: Disinfect the bathing AREA and wash towels to maintain hygiene.
Tips for Reducing Stress
-
Start Young: If possible, introduce kittens to bathing early so they become accustomed to the process.
-
Be Patient: Never force your cat into the water or rush the process, as this can create lasting fear.
-
Use Positive Reinforcement: Reward calm behavior with treats or affection throughout the process.
-
Consider Alternatives: If bathing is too stressful, ask your vet about waterless shampoos or professional grooming services.
-
Know Your Cat’s Limits: Some cats may never tolerate baths. If your cat becomes extremely distressed, stop and consult a veterinarian or groomer.
When to Avoid Bathing
Avoid bathing your cat if:
-
They are sick, injured, or recovering from surgery, unless directed by a veterinarian.
-
They are extremely stressed or aggressive, as this could lead to injury for both of you.
-
The bath is purely cosmetic and not necessary, as frequent bathing can dry out their skin.
How Often Should You Bathe Your Cat?
Most cats don’t need regular baths. Short-haired cats may only require a bath every few months or as needed, while long-haired cats might benefit from bathing every 6–8 weeks to prevent matting. Cats with specific medical conditions may need more frequent baths, but always follow your veterinarian’s guidance.

3:
Nail Care: Trimming Without the Trauma
Proper nail care is essential for maintaining healthy hands and feet, but trimming nails can sometimes lead to discomfort, pain, or even injury if not done correctly. Whether you’re trimming your own nails, a child’s, or a pet’s, the process doesn’t have to be stressful. This guide provides practical, trauma-free techniques for achieving neat, healthy nails without the hassle.
Importance of Safe Nail Trimming
Nails shield the delicate skin at the tips of fingers and toes, but overgrown nails can部分 of this h2 heading can become brittle, prone to snagging, or collect dirt. Poor trimming practices can cause painful conditions like ingrown nails or infections. Using careful methods, you can maintain tidy nails and sidestep these issues.
Essential Tools for Nail Care
To trim nails safely, gather these tools:
-
Nail clippers: Opt for sharp, high-quality clippers designed for fingernails or toenails.
-
Nail scissors
-
Emery board or nail file: Smooths rough edges post-clipping.
-
Cuticle pusher: Gently nudges cuticles back for a polished look.
-
Rubbing alcohol or antiseptic wipes: Sterilize tools before and after use.
-
Moisturizer or cuticle oil: Hydrates nails and surrounding skin after trimming.
Always sanitize tools before use to avoid infections, and replace dull clippers or files for clean cuts.
Steps for Stress-Free Nail Trimming
Soften Nails First
Soaking nails in warm, soapy water for 5-10 minutes softens them, making trimming easier and reducing splitting. For thicker toenails, soak for up to 15 minutes. Pat dry to keep the area clean.
Pick the Perfect Moment
Timing is crucial, especially for kids or pets.For children, try trimming during naps or while they’re engaged with a toy or show. For pets, wait until they’re drowsy or post-exercise.
Trim Carefully
-
Fingernails: Cut straight across, following the finger’s natural curve. .
-
Toenails: Trim straight across to avoid ingrown nails. Don’t round corners, as this can lead to nails growing into the skin.
-
Children’s nails: Use small, rounded-tip scissors or baby clippers. Trim in tiny increments while the child is still.
-
Pet nails: Use pet-specific clippers and avoid the quick (the pink area with blood vessels). Trim small amounts or consult a vet if unsure.
Smooth Rough Edges
Post-trimming, use an emery board or nail file to gently smooth jagged edges. File in one direction to avoid splitting. For kids and pets, ensure edges are soft to prevent scratching.
Tend to Cuticles
After soaking, gently push back cuticles with a wooden or rubber-tipped pusher. Avoid cutting cuticles to prevent infections. Apply cuticle oil for hydration.
Hydrate Skin
Trimming can dry out the surrounding skin. Apply a nourishing cream or oil to nails and cuticles to lock in moisture, promoting flexibility and preventing cracks.
Avoiding Nail Trimming Pitfalls
-
Don’t cut too short: Trimming too close to the skin can cause pain and an increased risk.
-
Keep tools clean: Always sterilize clippers and files to prevent bacterial or fungal growth.
-
Take your time: Rushing can lead to mistakes, especially with fidgety kids or nervous pets.
Tailored Trimming Tips
Trimming Kids’ Nails
Nail trimming can be tricky for parents, but patience pays off. Use distractions like singing or storytelling. If a child resists, trim over multiple sessions. Always use baby-safe tools to minimize risk.
Clipping Pet Nails
Pet nails need extra care. Let pets sniff the clippers first to familiarize them. Reward with treats post-trimming for positive reinforcement.
Handling Thick or Aging Nails
Seniors or those with conditions like diabetes may have thicker nails or less sensation. Soak nails longer, use heavy-duty clippers, and consider a podiatrist’s help to avoid injury.
Promoting Strong Nails
Beyond trimming, maintain nail health with these habits:
-
Eat foods rich in biotin, zinc, and protein to boost nail growth.
-
Avoid nail-biting or picking at cuticles.
-
Wear gloves during chores to shield your nails from water and chemicals.
-
Moisturize hands, feet, or paws regularly to prevent brittleness.
When to Consult a Professional
For persistent issues like ingrown nails, fungal infections, or abnormal growth, see a dermatologist, podiatrist, or veterinarian. Experts can offer targeted treatments and advice.
Wrapping Up
Nail trimming doesn’t need to be a daunting task. With the right tools, careful techniques, and proper timing, you can keep nails neat and healthy for yourself, your family, or your pets. Prioritizing preparation, precision, and aftercare ensures a smooth, pain-free process that maintains nails in great condition.

4
Gentle Cat Ear and Eye Cleaning for Optimal Health
Regular, gentle cleaning of your cat’s ears and eyes prevents infections, ensures comfort, and helps detect issues early. This concise guide offers practical steps for safe, stress-free cleaning.
Why Clean Ears and Eyes?
-
Prevents Issues: Removes wax, debris, and bacteria to avoid ear mites or conjunctivitis.
-
Ensures Comfort: Reduces irritation and itching.
-
Spot Problems: Reveals redness, odors, or discharge early.
-
Builds Trust: Gentle handling strengthens your bond.
Preparation
Supplies
-
Ears: Vet-approved ear cleaner, cotton balls/gauze, towel, treats.
-
Eyes: Sterile saline or eye wash, soft cotton balls/cloth, treats.
-
Avoid cotton swabs or human products.
Setup
-
Choose a quiet, familiar space.
-
Calm your cat with petting.
-
Wrap in a towel if needed for security.
-
Keep sessions short and gentle.
Cleaning Cat Ears
Healthy ears are pale pink, odor-free, with minimal wax.
-
Inspect: Check for redness, swelling, or dark debris. Consult a vet if abnormal.
-
Apply Cleaner: Warm vet-approved solution, add a few drops to the ear canal.
-
Massage: Gently rub the ear base for 20 seconds to loosen debris.
-
Wipe: Use cotton balls to clean the outer ear. Never go deep.
-
Dry & Reward: Dry with a clean cotton ball, offer treats.
-
Repeat: Use fresh supplies for the other ear.
Frequency: Every 1–2 months, or as vet advised.
Cleaning Cat Eyes
Healthy eyes are clear, with minimal crust.
-
Examine: Look for redness, colored discharge, or squinting. Consult a vet if unusual.
-
Prepare Solution: Use warm saline or eye wash on a cotton ball.
-
Wipe: Gently clean from the inner eye outward. Use fresh cotton balls per wipe.
-
Avoid Eyeball: Focus on the surrounding skin to prevent injury.
-
Dry & Reward: Pat dry, give treats.
-
Repeat: Use fresh supplies for the other eye.
Frequency: Weekly, or as needed for breeds like Persians.
Warning Signs
Seek a vet for:
-
Ears: Persistent shaking, scratching, odor, or gritty debris.
-
Eyes: Colored discharge, cloudiness, or squinting.
-
Behavior: Pain, lethargy, or aggression.
Tips
-
Start cleaning young for familiarity.
-
Be patient; stop if your cat resists.
-
Avoid over-cleaning to prevent irritation.
-
Use treats to create positive associations.
-
Tailor to breeds (e.g., floppy-eared or flat-faced cats need extra care).
Mistakes to Avoid
-
Using alcohol, peroxide, or human eye drops.
-
Forcing cleaning, causing stress.
-
Ignoring symptoms or cleaning too deeply.
Veterinary Care
Consult a vet for chronic issues, pain, or abnormalities. They may recommend tests or medication treatments.
Routine
Integrate cleaning into grooming every 1–2 months. Track sessions and observations for vet visits.

5
Cat Oral Health: Fostering a Bright, Pain-Free Smile
A clean mouth prevents painful conditions, supports overall vitality, and ensures fresh breath. This fully original, concise guide provides actionable steps to maintain your cat’s dental hygiene effectively.
Why Oral Health Is Crucial
-
Prevents Dental Issues: Removes plaque and tartar to stop gum disease or tooth decay.
-
Protects Systemic Health: Poor oral hygiene can affect organs like the kidneys or heart.
-
Maintains Fresh Breath: Eliminates bacterial odors for a pleasant mouth.
Preparation
Supplies
-
Cat-specific toothbrush (soft-bristled or finger-style).
-
Veterinary-approved toothpaste (human toothpaste is toxic to cats).
-
Vet-recommended dental treats, chews, or water additives.
-
Soft cloth or gauze for introductory cleaning.
-
Treats to reward cooperation.
Setup
-
Select a tranquil, familiar space.
-
Ease your cat with gentle stroking or a quick play session.
-
Secure them lightly with a towel if they’re restless to keep them calm.
-
Keep sessions short, around 1–2 minutes, to avoid stress.
Steps to Clean Your Cat’s Teeth
Healthy teeth appear white or slightly yellow, with pink gums and no strong odor.
-
Gradual Introduction:
-
Allow your cat to explore the toothpaste by sniffing or licking it over a few days.
-
Gently touch their lips and gums to familiarize them, rewarding them with treats.
-
-
Inspect the Mouth:
-
Carefully lift the lips to check for inflamed gums, cracked teeth, or foul smells.
-
-
Brush with Care:
-
Lift the lip and brush in soft, circular motions along the gum line, beginning with just a few teeth.
-
Focus on the outer surfaces, as the tongue naturally cleans inner areas.
-
-
Complete and Reward:
-
Clean the brush thoroughly or dispose of used gauze.
-
-
Incorporate Dental Aids:
-
Use vet-endorsed dental treats or water additives to help manage plaque buildup.
-
These support brushing but cannot replace it entirely.
-
Frequency: Brush daily, or at a minimum 3–4 times per week. Follow vet advice for dental aids.
Warning Signs
Seek veterinary attention if you notice:
-
Red, swollen, or bleeding gums.
-
Loose, broken, or discolored teeth.
-
Ongoing bad breath or excessive drooling.
-
Difficulty eating or pawing at the mouth.
Tips for Success
-
Start oral care early to help your cat adapt comfortably.
-
Stay patient; pause and retry later if your cat resists.
-
Opt for cat-friendly toothpaste flavors, such as salmon or chicken, to encourage cooperation.
-
Schedule annual veterinary dental checkups for professional cleanings.
-
Tailor care for breeds like Abyssinians, which may be more prone to dental concerns.
Mistakes to Avoid
-
Using human toothpaste or abrasive tools can harm your cat.
-
Forced brushing may cause fear or stress.
-
Ignoring dental symptoms, as they can worsen quickly.
-
Skipping professional cleanings, as home care may not remove all tartar.
Veterinary Support
Yearly dental exams are essential. Veterinarians may recommend:
-
Deep cleanings under anesthesia to address stubborn tartar.
-
Diagnostic imaging to identify underlying issues.
-
Treatments or extractions for severe dental conditions.
Establishing a Routine
Integrate dental care into your cat’s regular grooming schedule. Record brushing sessions and note any changes in eating habits or behavior to share with your vet during checkups.
6
Managing Cat Mats and Shedding: Solving Common Coat Issues
Mats and excessive shedding can trouble cats, leading to discomfort or health concerns if ignored. This fully original, concise guide provides effective strategies to tackle matted fur and shedding, ensuring your cat’s coat stays healthy and vibrant.
Why Addressing Mats and Shedding Is Key
-
Ease Discomfort: Mats tug at the skin, causing irritation or pain.
-
Protects Health: Mats can conceal wounds or parasites; shedding can cause hairballs.
Understanding the Issues
-
Mats: Knotted fur clumps, often in long-haired cats, forming in areas like the neck, legs, or underbelly.
-
Shedding: Normal hair loss, intensified in thick-coated breeds or during seasonal shifts (spring/fall).
Preparation
Supplies
-
Wide-tooth comb and slicker brush (for detangling and finishing).
-
Dematting comb or mat breaker (for tough knots).
-
Blunt-tipped cat-safe scissors (for careful trimming).
-
Deshedding brush (e.g., for heavy-shedding breeds).
-
Treats to reward cooperation.
-
A towel or stable surface for comfort.
Setup
-
Pick a calm, well-lit spot.
-
Soothe your cat with light petting or a brief playtime.
-
Gently wrap them in a towel if they squirm.
-
Limit sessions to 5–10 minutes to keep them relaxed.
Handling Mats: Step-by-Step
Mats occur when loose hair tangles, especially in high-movement areas.
-
Locate Mats:
-
Run your fingers gently over the coat to find knots.
-
Inspect for skin redness, sores, or fleas underneath. Contact a vet if issues appear.
-
-
Ease Small Mats:
-
Use fingers or a wide-tooth comb to carefully separate minor mats.
-
Start at the outer edges, working inward to minimize skin pulling.
-
Apply a vet-safe detangling spray to loosen knots.
-
-
Address Stubborn Mats:
-
Use a dematting comb to slice through larger mats in small sections.
-
Hold skin steady to avoid cuts.
-
For tight mats, trim cautiously with blunt scissors, keeping a safe distance from the skin.
-
-
Smooth the Coat:
-
Clear loose fur to prevent new tangles.
-
-
Reward and Check:
-
Offer treats and affection for a positive experience.
-
Monitor regularly to spot new mats early.
-
Frequency: Inspect daily for long-haired cats, weekly for short-haired ones.
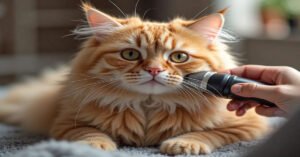
Controlling Shedding: Step-by-Step
Shedding is natural, but manageable to reduce mess and health risks.
-
Brush Consistently:
-
Use a deshedding brush or slicker brush to remove loose hair.
-
Brush along the hair’s direction, targeting the back, flanks, and tail.
-
For thick-coated cats, use an undercoat comb to reach deeper fur layers.
-
-
Monitor Skin:
-
Check for dryness, irritation, or bald spots during brushing. Consult a vet if present.
-
-
Bathe Sparingly:
-
Use cat-safe shampoo every 6–8 weeks to dislodge dead hair (avoid frequent baths).
-
Dry completely and brush to clear loose fur.
-
-
Promote Coat Health:
-
Feed a diet rich in omega-3s for a shiny coat.
-
Ensure ample fresh water for skin hydration.
-
-
Reward and Tidy:
-
End with treats to encourage good behavior.
-
Use lint rollers or vacuums to manage household hair.
-
Frequency: Brush daily during peak shedding, 2–3 times weekly otherwise.
Red Flags
Seek a vet for:
-
Mats: Ongoing matting or skin issues beneath knots.
-
Behavior: Discomfort, aggression, or withdrawal during grooming.
Tips for Success
-
Begin grooming early to familiarize your cat.
-
Adjust for breeds (e.g., Maine Coons for mats, Ragdolls for shedding).
-
Clean tools after use to maintain effectiveness.
Mistakes to Avoid
-
Tugging mats harshly, risking skin tears or pain.
-
Using human grooming products, which may irritate.
-
Overlooking causes of shedding, like parasites or nutritional gaps.
-
Clipping too closely, exposing skin to harm.
Veterinary and Professional Help
-
Vets: Can identify skin conditions, allergies, or dietary needs affecting the coat.
-
Groomers: Ideal for severe mats or uncooperative cats, offering safe shaving or detangling, sometimes under sedation.
Creating a Routine
Blend grooming into your cat’s care plan, alongside other tasks like nail clipping. Log grooming sessions and track coat or skin changes for vet discussions.
Conclusion
In conclusion, dedicated cat grooming is essential for ensuring your feline companion’s health, comfort, and happiness. Regular care—encompassing brushing to prevent mats, managing shedding, maintaining dental hygiene, and gently cleaning ears and eyes—prevents pain, reduces the risk of infections, and keeps your cat’s coat and appearance radiant. By using appropriate tools, approaching each session with patience, and integrating professional veterinary support when necessary, grooming becomes a nurturing ritual that strengthens the bond between you and your cat. This consistent effort not only enhances their physical well-being but also fosters trust and affection, paving the way for a thriving, joyful life together.